Working with Git (or some type of subversion control system) makes web development so much easier. It’s greatly beneficial for teams, but it’s still very advantageous for even solo web developers too. I’ve recently worked with a small team to develop a web application. For me as the developer, I was the one left in charge of the server as well. One goal that we had in mind, was to enable the design team to push front end changes to our BitBucket repository that would automatically be reflected on our development server. I’d like to write briefly about how I conceptually put this process together, while linking to sources that go a little deeper into my methodology.
1. Enable the POST Web Hook
2. Configure the SSH keys for BitBucket
3. Configure an SSH PULL request
4. Create a POST route handler
Web hooks are offered by most of the subversion control websites out there like Bitbucket and GitHub . . . I like to use BitBucket for hosting my private repositories. The concept is the same anywhere else you go, but basically this is the gist of it. On the BitBucket website, the user has access to configure an URL route for handling a POST request that occurs after each commit to the repository. The incoming POST request is bringing data with it, however we really need to only listen for the request and then run our server side Git PULL request. You can find out how to configure your POST hook request on BitBucket here.
Normally when updating the server’s code from the Git repository, I would SSH into the server and run my Git pull request from the terminal. If we’re going to have our web server listening for the repository update, we’re going to need to find out our web server’s credentials for then responding to the POST request. Since the web server itself will be making the PULL call to Git, we need to find out which credentials the web server has. I found a link to show me a command for determining the user and group my web server was running as. In my case, I’m running nginx on a Digital Ocean droplet.
ps -eo pid,comm,euser,supgrp | grep nginx
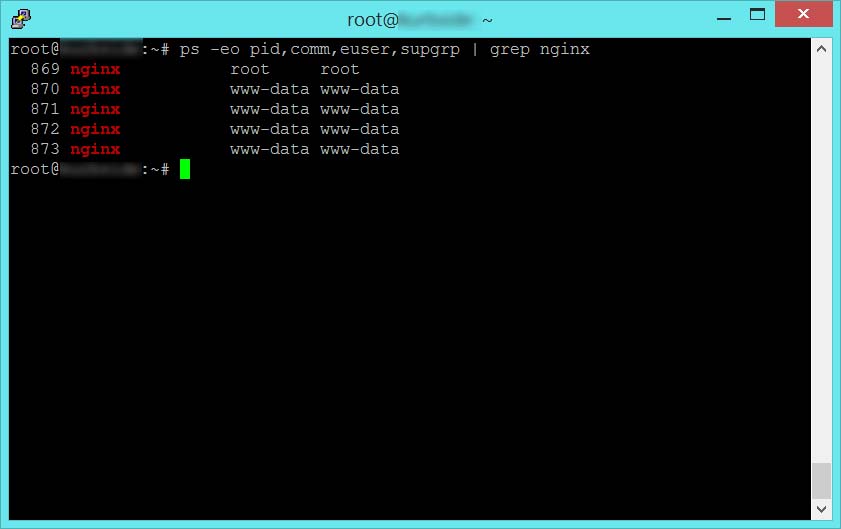
The resulting output from this command tells me that my nginx server is running as user and group www-data. It’s important to know this because this is the user that I need to configure SSH keys for to access my private BitBucket repository. So the next question is, where does user www-data store SSH keys? The SSH keys are in a sub folder called .ssh of the user’s home folder. To find the home folder of all my users on the system, I can run a simple command.
The SSH keys for any user are in a subfolder of that user’s home folder.
cat /etc/passwd
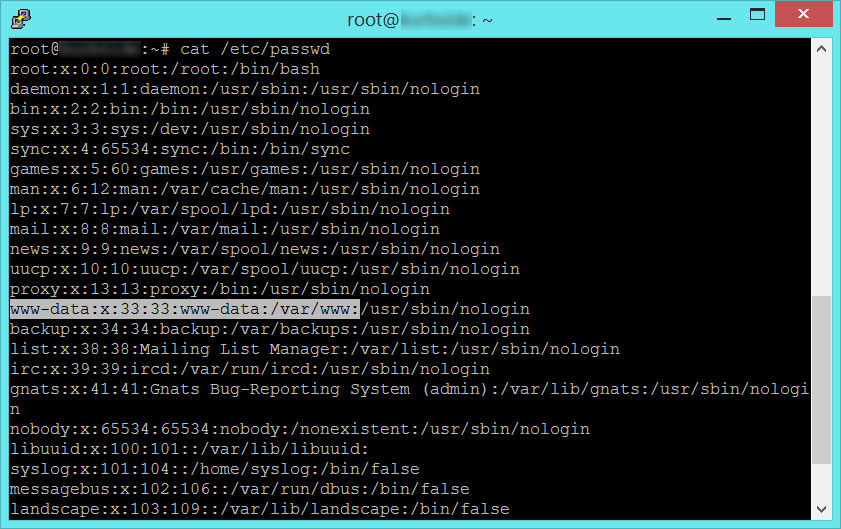
Nice! Now I know the www-data user is going to store SSH keys in /var/www/.ssh
Learning more about SSH keys can be found all over the web. This answer on StackOverflow specifically talks about how you can generate SSH keys for your web user. They use Apache in this case. Regardless, it’s putting the private/public keys in the folder that we just found.
So now we’ve found a way to prepare our web server to make a git pull request from our private repository, in this case on BitBucket. We’re automating it by having the web server itself respond to a POST hook request, and use it’s own SSH keys to avoid needing a password when it makes a PULL request to BitBucket. Normally when I update the repository on my development server, I SSH into the server and then just run a basic command line call.
git pull origin master
This command is the basic Git request to merge the repository on the server into the existing branch you are calling from. The important thing to realize though is the way you are calling Git. By design, Git has four different protocols you can use for making a request from a repository. By default, when I run the command above in my SSH terminal, I am making an HTTPS request to the repo’s server (BitBucket) from my production server. When I call for a PULL in this manner, I’m going to be required to provide a password. Since I’m looking to automate my call, this is not going to work. Fortunately, Git also allows for accessing a repository through the SSH protocol. This was probably obvious since we just made the SSH keys.
git pull ssh://git@bitbucket.org/username/repository.git
With this command, we’re telling Git that we want to use the SSH protocol, on the Bitbucket server, and we provide our BitBucket username and the repository we want to update. Now since the keys we configured are for the webserver and not the user we are logged in as, we can use another method for testing our call. We can use sudo to act as www-data from the command line to try it out and make sure our key works.
sudo -u www-data git pull ssh://git@bitbucket.org/username/repository.git
There are tools provided by SSH as well for testing out the keys. I use the following command to make sure that my www-data user can connect to the BitBucket private repository with the SSH keys in the /var/www/.ssh folder.
sudo -u www-data ssh -vT git@bitbucket.com
The command above will work for GitHub too, I even took the command right from their website. You just need to change the server at the end of the line. But really the point of this all is to see that we have created an automated way for the web server to access a private Git repository. We can then test it using the sudo -u command, to bottleneck any problems that may have come up. The following code is a simple Route handler I wrote with Laravel for processing the server side response to the POST hook.
Route::post('deploy', function() {
// Change to the git root
exec('cd /usr/share/nginx/html/', $output);

// Discard any changes to tracked files since our last deploy
exec('git reset --hard HEAD', $output);

// Update the local repository
exec('git pull ssh://git@bitbucket.org/username/repository.git', $output);
echo 'PULL Request '.implode(' ', $output);

});
I owe a huge special thanks to Caspar Green for helping me initially figure out where I was going wrong on this endeavor.
thanks for the post.
you are a life saver.