One of the local development environments I’ve been working from lately is the Laravel Homestead server setup through a VirtualBox put together by Taylor Otwell. This instance is running Ubuntu 14.04, with support for several web development tools. The idea is simple, launch a headless virtual machine on your local development machine to handle all of the server side tasks for you involving the web server(Nodejs, nginx), PHP server, and database servers(MySQL, PostgreSQL). This also happens to be officially supported by Laravel, and full instructions for installation can be found here (http://laravel.com/docs/homestead). Let’s see why we’d want to use this now.
So this virtual machine become accessible from your local dev box through port 8000, versus HTTP’s standard port 80. The real beauty of this is the link you establish between a server folder on your virtual machine, and a local folder on your development box. You can still use your beloved text editor of choice to make changes directly to the server, without FTPing the changes back. Just save locally, and the changes are immediately reflected on a quick refresh in your browser.
Being an actual Ubuntu instance running on your machine, you can hop right on to it via the SSH protocol. I prefer PuTTY as my SSH client in the Windows 8 environment, so there were a few discoveries I had to make on my own that I didn’t find in the documentation.
The documentation does encourage the use of the “vagrant ssh” command to launch a local ssh terminal to login to your Vagrant Box. This is easy enough to do if you properly launched your Vagrant instance with the “vagrant up” command. In order for this to work though, all of the configuration setting paths you provided in the Homestead.yaml file must actually exist.
The documentation points you in the right direction for generating a public key if you don’t already have one, but if you do have one there’s a good chance it’s in the .ssh folder located in your local Users\<YOURNAME>\.ssh folder. It’d be name id_rsa. The documentation spells this case out pretty clearly.
Now the trick here with PuTTY is figuring out the public and private keys to be using with your box. PuTTY uses it’s own format for private keys with a .ppk extension. Vagrants does not provide us with a compatible key to use with PuTTY. So we just need to find our private key, and convert it to one that PuTTY can understand.
In order to find your private key, let’s get the vagrant instance running with the “vagrant up” command. Next we can run another command from the command line to see where vagrant is storing our private key. Type in “vagrant ssh-config”, and you’ll be given a few lines of response. The information I found to help me was on this line right here:
IdentityFile C:/Users/Chris/.vagrant.d/insecure_private_key
If you try loading this into putty you will get an error when trying to connect, so we just need to convert it to a PuTTY .ppk file. Fortunately, we are given this tool by PuTTY, and can download puttygen.exe from this page.
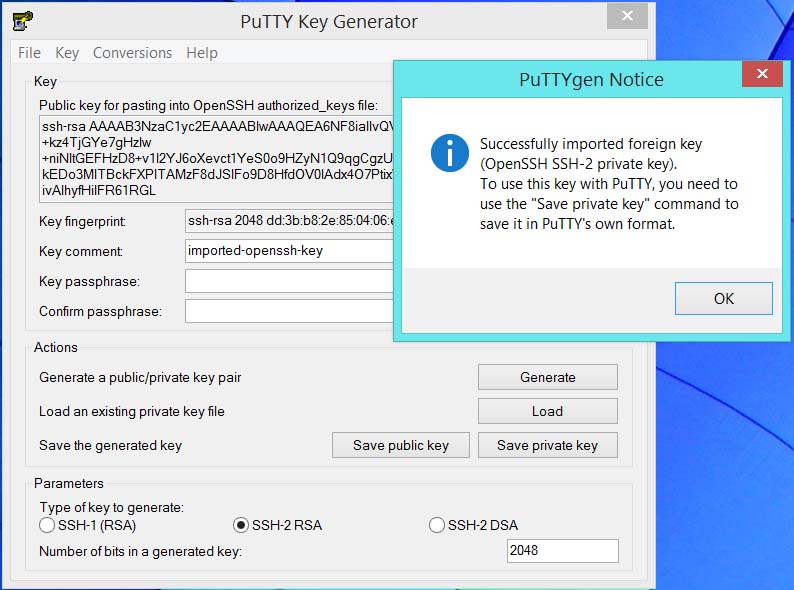 We want to load the existing private key that we found in the .vagrant.d folder, but the puttygen.exe utility is only displaying the .ppk files by default. So click on the “Load” button by “Load and existing private key”, and set the dropdown to display all files. Navigate to the path you found from the command line when querying the ssh-config settings, and load the file you find.
In my case, it was called : insecure_private_key
Now that it’s loaded, and you don’t need to supply a password if prompted, save it as a PuTTY .ppk file.

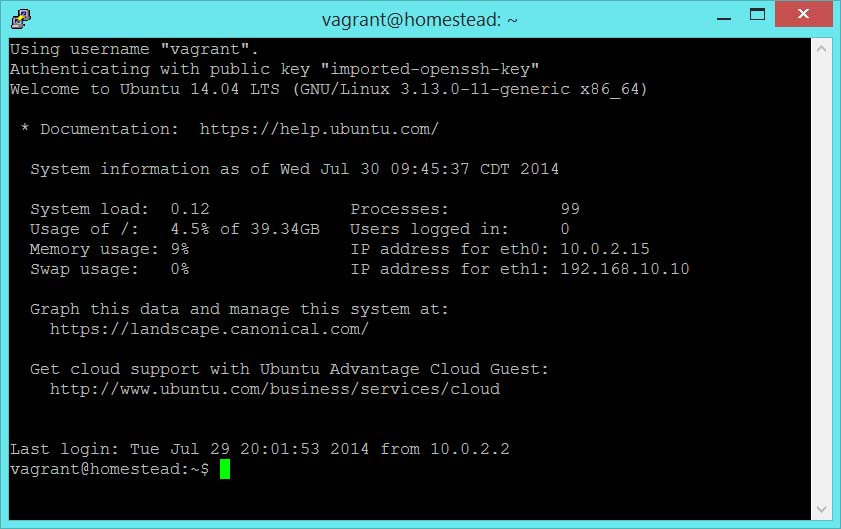
All we have to do now is to tell PuTTY to use this private key when logging in to our Vagrant Box. Load the settings you should have saved for your Homestead server, then navigate to the Auth tab as shown.
The part that stumped me was identifying the private key in the first place. I may have overlooked in the documentation where to find it earlier, but it is clearly available with the command line. I did find a workaround early on though so that I did not need my private key file, and that was simply loggin in with both a username and password of “vagrant”. Now I have my key saved in PuTTY, and everything is automatic.
thank you Chris, you helped me very much!
Thanks for your help. Great article